How to Programmatically Fill a PDF Form with Raw JavaScript (The Easy Way)

Programmatically filling PDF forms can be straightforward or tricky, depending on the setup. The challenge usually depends on whether you are writing everything from scratch, using a JavaScript library, how the form fields are named, and how well those names match your data model.
A more subtle challenge comes from the limitations of the libraries you choose. Most PDF form automation tools work by directly manipulating AcroForm fields, which means you are often responsible for validation, may need layout workarounds for repeating data, and have limited ability to modify or restructure fields once they are embedded in the PDF.
When populating PDF form fields with structured datasets like the following JSON data:
Most libraries simply map data into AcroForm fields and then flatten the PDF into static elements. Unlike most tools, Joyfill Form Builder and Filler SDK provides a more flexible abstraction layer that supports defining and validating fields, updating their structure over time, and conditionally showing or hiding elements, all without being tied to the PDF internal layout.
This guide shows how to use Joyfill to programmatically fill PDF forms in Node.js. We will cover reading fields, inserting data, and saving the PDF to create a reproducible workflow.
Why use Joyfill to Programmatically fill PDF Forms?
Traditional JavaScript PDF libraries focus on direct field manipulation. You parse the PDF, find matching field identifiers, inject values, then flatten everything. This approach works for small and stable forms, but it quickly breaks down as complexity grows.
A major limitation comes from the underlying PDF technologies themselves. PDF forms are built on two incompatible architectures: AcroForms and XFA (XML Forms Architecture). Most libraries only support one of them, usually AcroForms. As a result, XFA fields are often ignored entirely, leaving sections of your form blank when filled programmatically.
Even when fields are supported, developers still run into challenges when:
Field names do not map cleanly to the data model
The form structure needs to evolve
Layout changes frequently
Conditional visibility or computed values are required
Business logic must live outside the PDF binary
Joyfill removes these constraints by representing PDF forms as a JoyDoc. The PDF becomes a visual layer, while the JoyDoc serves as the source of truth for field structure, data, metadata, and layout. Instead of interacting with brittle PDF internals, developers work with a predictable JSON model that remains stable, even when templates change. This is especially valuable when the same dataset needs to populate multiple document formats.
Key advantages for developers
You work with a JSON schema rather than PDF internals
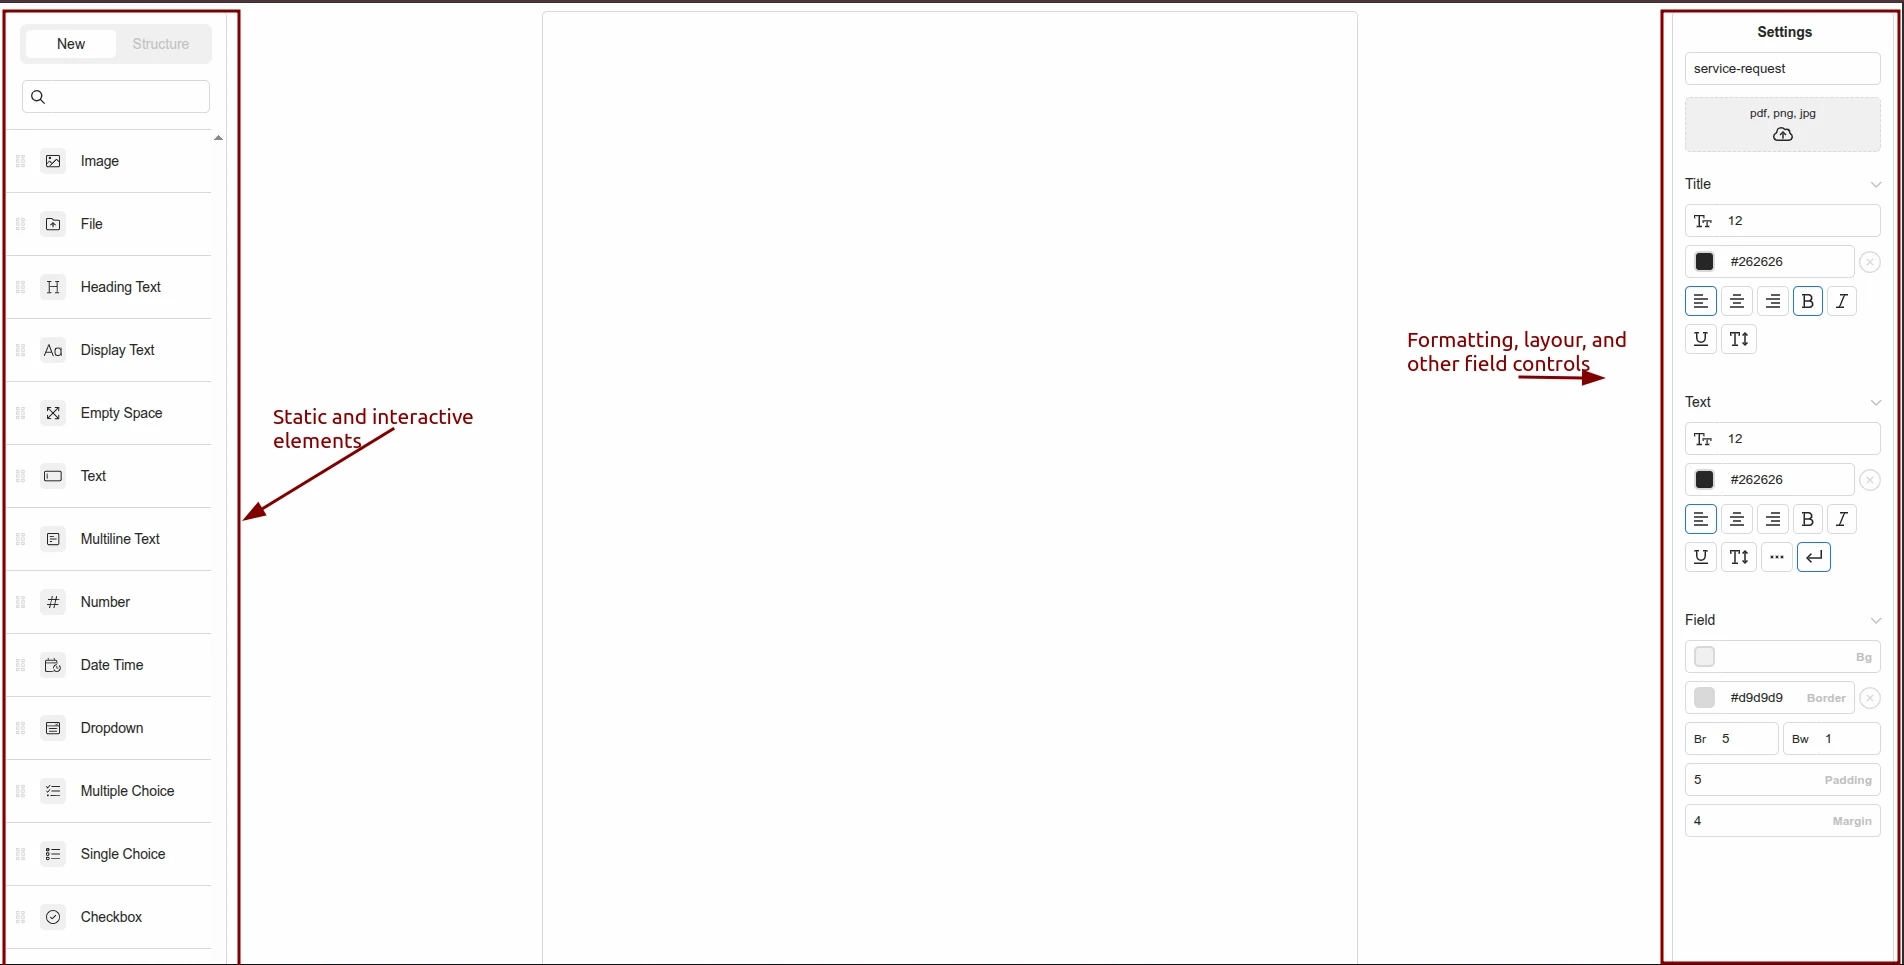
JoyDoc represents your form in a structured JSON format. Each page, field, and resource is addressable through identifiers, making it simple to fetch, update, or compose documents through code rather than manual layout editing.
Every field has a stable identifier
Instead of guessing where values belong, you reference clear identifiers that do not change even if the document layout moves. This lowers maintenance cost and removes the need for repeated parsing.
Metadata lets you enrich documents
You can attach metadata to documents, pages, and fields. This enables structured workflows like tagging fields for export, versioning forms, or passing custom rules along with templates.
Formulas give fields logic
Formulas allow fields to compute values from other fields. For example, summing rows, handling default values, or applying conditional logic. No additional code is required for these computed results once the formulas are defined.
Better adaptability over time
If the PDF form changes, the identifiers and JSON structure allow you to update the document without rewriting your automation logic. You are not locked into the PDF internal layout.
Consistent PDF Forms
Most problems with programmatically filling PDF forms start long before any code runs. They are usually caused by how the form was authored. A poorly structured PDF form can make automation painful, no matter how clean your code is.
Standardize Form Structure Through JoyDoc
With Joyfill, this complexity disappears entirely. Forms created through Joyfill are represented as JoyDocs, a unified format that provides a consistent, predictable structure regardless of the underlying PDF technology. You don't need to worry about incompatible form types, fields that fail to populate, or data that vanishes during processing. Everything is managed through a single, stable model that keeps your form definitions and data perfectly aligned, every time.
For example, to create a PDF form using Joyfill, start by setting up a Joyfill form builder environment.
Create a new folder named
joyformand open it in your editor of choice.Install the project dependencies using your preferred package manager.
Add a
views/builder.ejsfile to the project.This file will serve as the main page for working with your form. It can load an existing template or create a new one when you open it in the browser.
Add an
index.jsfile to the project and save the following script as its contents:Run the script to start the
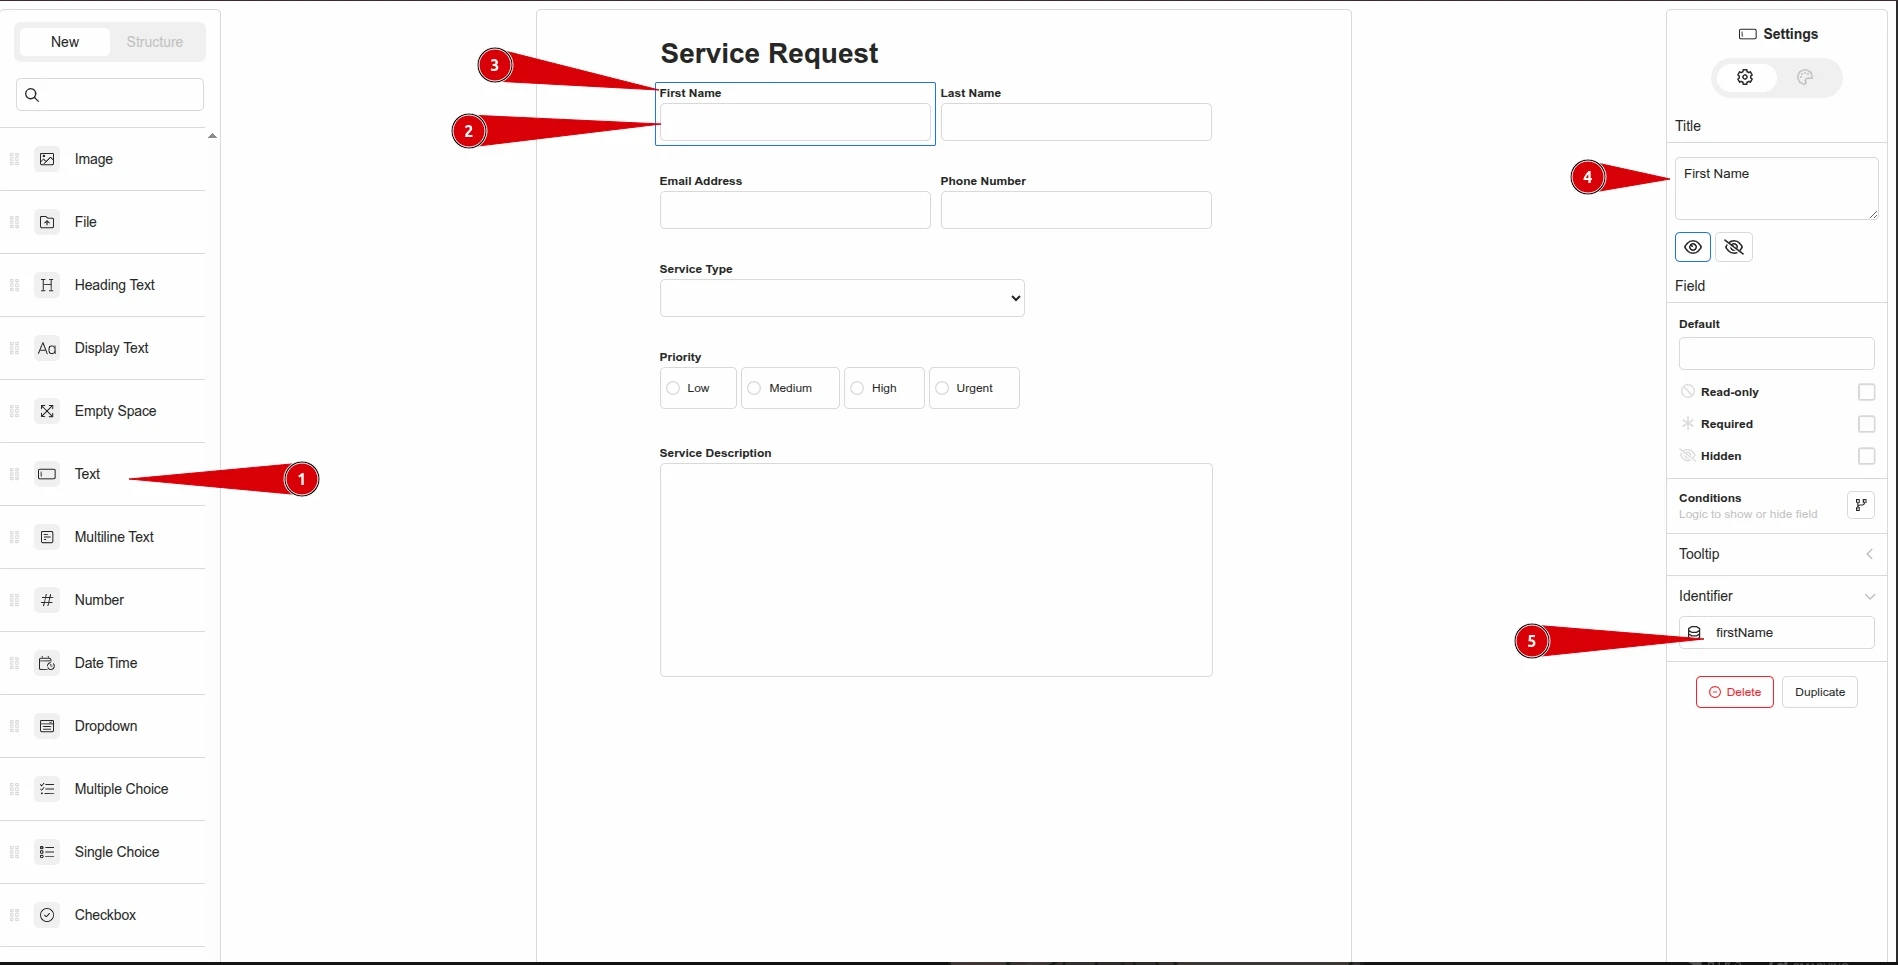
expressserver.Visit http://localhost:3000/form/service-request in your web browser. You should see the following PDF form builder.
Use Consistent, Meaningful Field Names
Automation depends on predictable field names. If your fields are named things like text1, text2, or field3, you will waste time figuring out what maps where during initial development and subsequent maintenance. To avoid this pitfall, always use clear, predictable names that match your data model (e.g., firstName, emailAddress, priority, etc.).
A few minutes spent creating a proper PDF form with consistent naming and accessible fields will save hours of debugging later. The cleaner the source form, the simpler the automation.
For example, add fields that you would normally find on a service request form to the form and give each field a human-friendly name through the identifier field as shown below.
At this point, the content of the project’s db.json file should look like the following:
Programmatically Fill the PDF Form
Now that we have a properly structured fillable form in the form of a JoyDoc, the next step is to map data to each form field. This data can come from JSON objects, database records, or other sources within your application. The goal remains the same: populate each PDF form field with its corresponding data field.
In the case of our current example project, using the service-requests.json file from the opening section of this post should suffice.
Add a
fill-forms.jsfile to the project and save the following as its contents:Add headless browser support to the project by running the following command:
Run the
fill-forms.jsscript.This should fill out the form fields, flatten the fields as static elements, and save them to binary PDF files in the
pdfsubfolder of the project.
Filling Other Form Field Types
The sample project in this post shows how to programmatically populate text fields, dropdowns, and single-choice options. If you need to support additional field types, you would extend the logic in the fill-forms.js script. In practice, this means updating the switch statement to recognize each new field type and apply the appropriate handling behavior.
Conclusion
Filling PDF forms with JavaScript is much simpler when you work with consistent structure instead of raw PDF internals. Joyfill makes this possible by standardizing forms as JoyDoc, keeping fields, metadata, and logic organized in one place.
This gives you reliable identifiers, predictable behavior, and flexibility as forms evolve. If you want a cleaner, more maintainable way to automate PDFs, Joyfill is an easy way to get there.
Need to build PDF capabilities inside your SaaS application? Joyfill helps developers embed native PDF and form experiences directly into their SaaS apps.

